How to build your next barrel sauna?
When it comes to putting all pieces together, it’s better to do it right the first time. In this article, we will share several expert tips on how to build your barrel sauna correctly and efficiently.
Tip 1: Make sure the surface where the sauna will sit is level.
Simply put, If the base is out of whack, the sauna is out of whack. You don’t want to discover this after your sauna is fully assembled and it’s so much better to notice and fix the issue on the spot. So, a level comes handy during the construction process to make sure the base is as even as possible. If you’re still noticing a bit of an incline after laying out the solid surface, then use shims underneath the cradles to compensate!
In addition, the golden rule for a suitable foundation is anything but directly on the bare earth! The popular choices are wooden deck, paver stones, concrete slab and compressed gravel.
Tip 2: Make sure the staves overlap the cradles uniformly on both ends.
We recommend placing the cradles about 5” from the ends of the staves, so an overhang of about 5” on the back and front of the sauna. If your sauna has more than two cradles, space the remaining ones evenly in between and you are set. Use a tape measure to double check your work!
Anchor the drain stave (the only stave with a cork) to the cradle first! Then, insert additional staves on each side of the base until you reach the ends of the cradles. Use a rubber mallet to align staves.
Tip 3: Nail every other stave to the cradle with a drill.
Use a nail gun to speed up the process. Continue this process until you’ve reach the midpoint on both sides, when the bottom half of the barrel is assembled. From this point onward, do not nail. Rather, use a strap to hold the staves in place while you continue adding more staves. This is important as we want the bands to cinch the staves together as tight as possible. The ultimate goal is to get a tight seal on your barrel sauna.
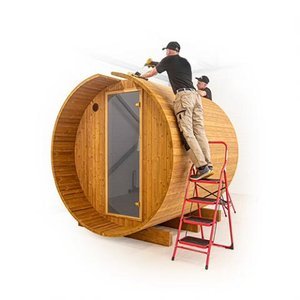
Use a ladder to finish adding the final staves. Or, you may find it easier to do it from inside of the barrel. Either way, the very final piece may be a little tricky to be guided into place.
Tip 4: Keep extra staves handy for future use.
Insert as many staves in as possible to have the tightest seal. Also, keep in mind that the lumber is going to expand and contract based on your climate as well as during your sauna sessions. You may need to insert additional staves or filler staves later. DO NOT THROW AWAY!